Saturday, October 27, 2012

Dark Vengence Deathwing Terminators

I painted the five Deathwing battle damaged and worn.
I like the part in Angels of Darkness when they are hot on the trail and do not remove armor or relax battle readiness until the conclusion.


Thursday, October 25, 2012

Dark Vengence Dark Angels Tacticals

Here are the Dark Angel portion of the Dark Venegnce set I have painted
Tactical Squad


I also added a Missile Launcher Brother if I choose that over Plasma Cannon


Wednesday, October 24, 2012

Dark Vengence Cultist Booster

I am currently finishing up The Dark Vengence Set with lots of extras.
A good way to flesh out your chaos cultists without buying another DV set is to use Empire Flegellants with IG weapons.


A very simple kitbash and the Flagellants already look like cultists.

Monday, September 3, 2012

Realm of Battle Board Tiles 4,3,2,1

The last four tiles are the valley/hill tiles
Nothing fancy painted in the same earth toones as the rest of the board.
This completes part one of my terrain project.


Part two will be an idea I got from the Forge World tile

Sunday, September 2, 2012

Realm of Battle Board Tile 5

This one took a little out of me.
I used Magic Water preformed ponds to make a bog tile with dead Chimera in the water.


I killed my dremmel cutting the forms out,I should of used the home grade routing tool ya know the Dewalt the RoB boards are tough as hell.
Then after the cuts I notice I applied one of the templates backward,arrgh.
With some creative card work and a few new cuts and I fixed the problem.
Then the pond water was supposed to be clear,which if I pulled off would of looked fantastic.
When using Realistic Water to make ponds you can only pour an 1/8 inch at a time.
Well I though I did that,poured it in so the pond had 1/8 in the bottom.
Then Gravity Happened,the bottom of the pond is not level its realistic.
It all moved to one corner now over 1/4 inch deep,when it is like that it dries cloudy,killing the effect.
To remedy I add Catachan Green to the second pour and made it a murky bog.
If I pulled it off the Chimera would of looked way cooler,the tracks would of been visible,I had cool debris in the bottom.
I used my new Dremmel to cut the Chimera at an angle so it sat deep in the pond.
I also used the tree half mold to add a couple of fallen trees,just to add a little more to the groundwork.
But in the end I am still very happy with the outcome,now I have my Mysterious Water hazard.

Tuesday, August 14, 2012

Tuesday Tip Cheap Airbrush Cleaner

I use many different media painting my minis with my airbrush.
Besides acrylic I also use enamels and Lacquer based metallic.
This is not a problem as long as you have a good cleaning routine.
I will try to never let the paint dry,I use enough in my cup that I am going to spray when finished I immediately run a bit of water or thinner through to keep it wet.
But when finished it is always a good idea to run some airbrush cleaner through it,I go through alot of the stuff.
At $5 for 4 fl oz it tends to get expensive,that's when I looked into what the fine scale modeler use.
I found out the name brand stuff is in fact regular Lacquer thinner you can but at the hardware store for $8 a quart or $20 a gallon.
I have been using this for the past two years and it works just as good as Alclad Lacquer Thinner.
I use it to clean the brush and thin Tamiya paint with for airbrushing.
I also bought a quart of odorless thinner that seems to work just as good for my enamels and oils.
But I suspect it is a touch stronger than Mona Lisa,but I have no issues if used on top of clear coat like
Testors Dullcote or Model Master Semi-Gloss.

Monday, August 13, 2012

Realm of Battle Board Tile 6

This one is the other flat tile the infamous skull tile.
The stone work did not photograph well there is alot more color and tone that got washed out in the photo.
Some people cover the skulls up but I like em,I am a true 40k fan in the spirit of Khorne.
Skulls for the Skull god I say,But I truly fear the 6th Coming Chaos power
The Cake God

Nom Nom Nom

Realm of Battle Board Tile 7

Hey all I have the next tile finished.
This is one of the standard vanilla tiles.
I added a touch of static grass for a spot of color
I bought four extra tiles to play with so I would also have a nicely painted standard set.

The board is coming along now I have all the standard tiles textured,primed and they are ready for drybrushing.
I could have my standard set ready in about an hour if I had to.
But there is no rush I have a giant underground complex to paint too ;)

Saturday, August 11, 2012

Realms of Battle Board Tile 8

I finished tile 8 today,this one is a forest tile.
I used 3 GW tree sets and made a cast of a half to make the fallen trees.
I used a combo of Celuclay and Ultracal to level out the groundwork for the three bases of the trees.
Funny thing originally I was using natural deadwood for the fallen trees.
While I set outside to dry a bird thought one of the branches was perfect for his house.
When I came back a branch was gone and he left a depression down to the plastic.
Turning lemons into tasty lemonade I made the depression a large puddle using water effects and Catachan Green with a touch of Admin Grey.
I ended up casting a tree halves because when once dry the difference between textures of the natural deadwood and GW trees smacked you in the face.


I have one more spare tile to make a theme with but not sure what to do.

Sunday, August 5, 2012

Realms of Battle Board Tile 9

This tile is an homage to the old starter set"The Battle for Macragge"
The crater in the corner will go along with tile 10 for a rolling thunder barrage crater set.
Poor Lt. Varvus does not think too highly of the Dark Angels hunt the Fallen rule


Saturday, August 4, 2012

Realms of Battle Board Tile 10

Hey-oooo everybody,
So like I said I bought me a Realm of Battle board along with four expansion tiles.
So that give me a total of 10 tiles to finish.
I am using my expansion tiles for special 40k themed tiles.
The first is a Rolling Thunder barrage tile full of bomb craters dropped in series.

The next tile will also have a small crater on the edge so when I line up the two tile.
The barrage is going across the board.

Thursday, August 2, 2012

The Finished FW Stronghold Board

I just wanted to show you guys what this bad boy looks like with a few layers of paint


I also replaced the lense on the security camera with a 3mm AK interacive optic lense
I have also started on the second tile.
Using a flat expansion tile and moonscape craters I have made a convincing barrage tile.

Tuesday, July 31, 2012

Tuesday Tutorial (Terrain Boards)

You ain't getting it every tuesady,but starting this week at least once a month,hopefull more I will post a tutorial of sorts.
Might be buying bargin supplies,a paint sceme,pretty much it will involve whatever I am working on at the moment.
Case in point last night I get home from work to find the Forge World Realm of Battle board on the stoop
So today it is time to prep it.
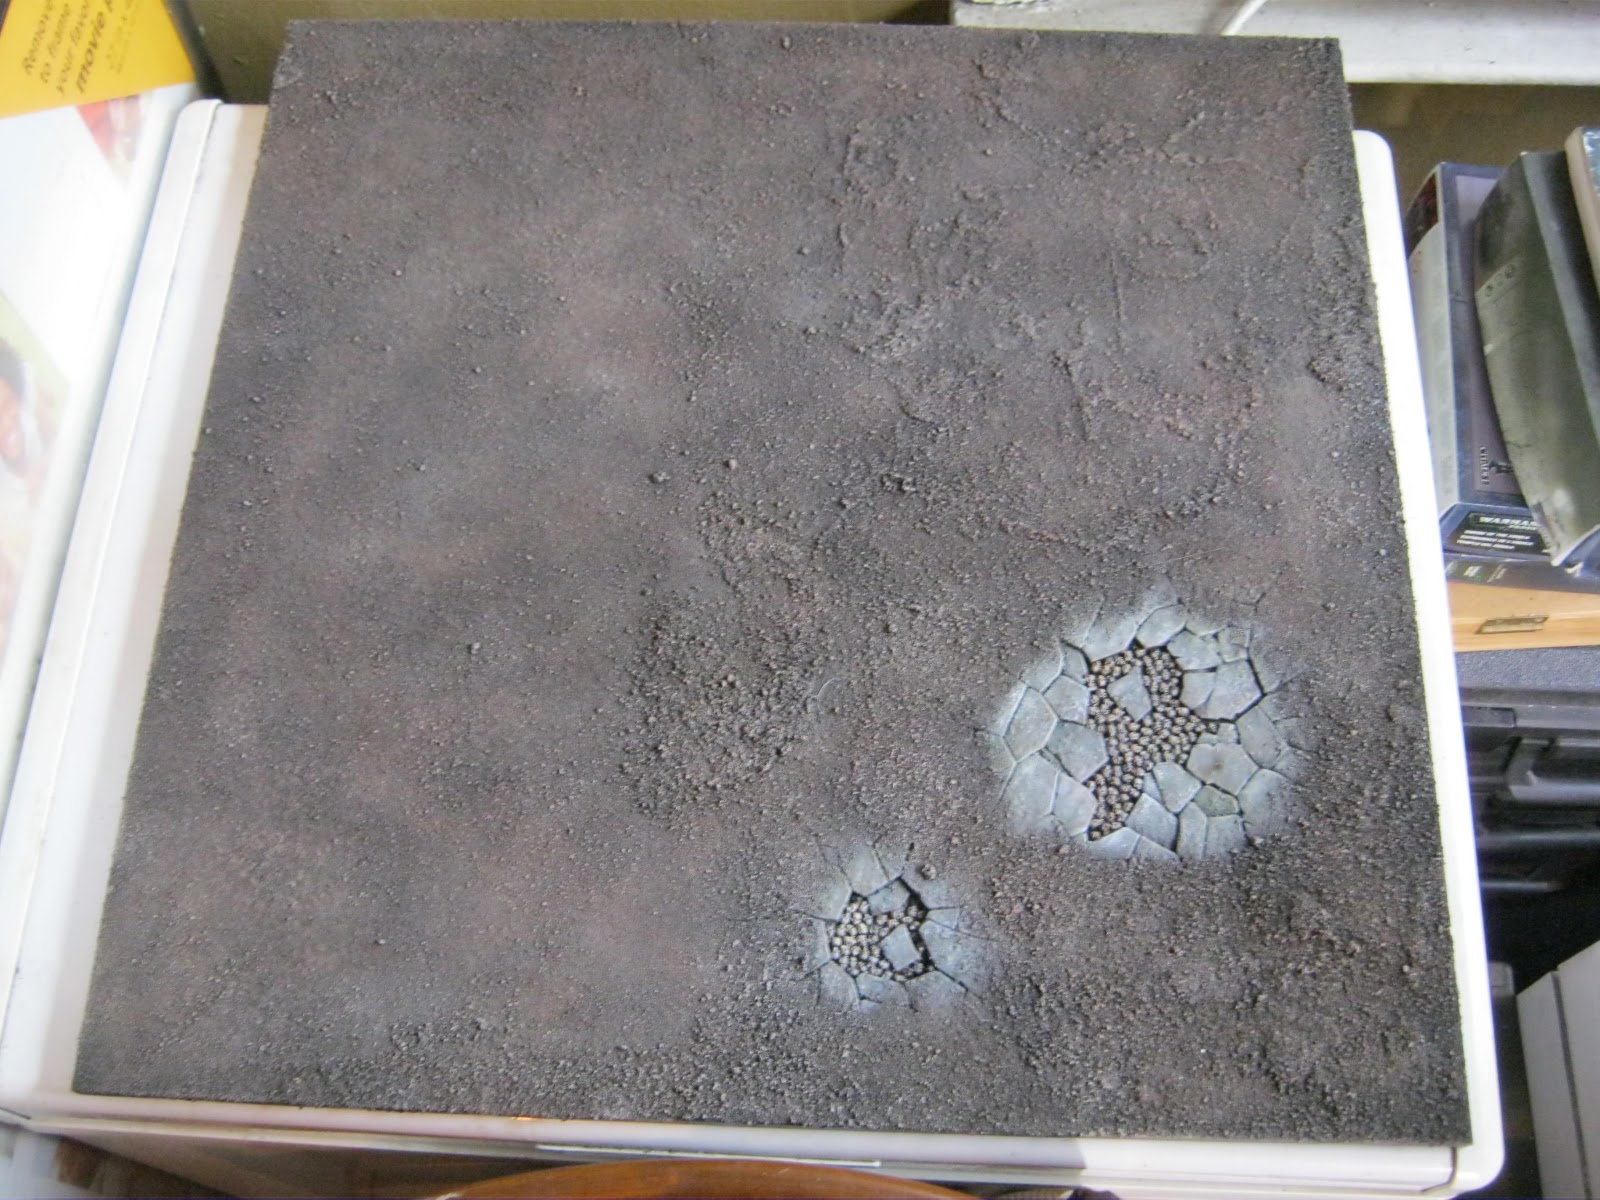
When I first looked at it my initial reaction is huh,detail in the ground work looks like it came from Russia but I am not worried.
The extra detail like the pillboxes and hanger were fine just the ground.
But I am reasonable sure it is meant to be flocked over and not used raw.
I bought fine and medium ballast at a model railroad shop along with a small bag of talus(small rocks) and add them all into the same container,this is the dirt mix.
I broke the board up into 6 imaginary sections and worked on one at a time to make sure the glue stayed fresh.
Starting at one corner I would lay some Original Tacky Glue onto where I want dirt.
I would dip the corner of the brush in water to help spread the glue and proceed to spread the glue out evenly.
Once spread cover the whole thing with a large pile of dirt mix and push lightly with your hand.
Tip the board over in a box cover to remove the excess.
Repeat this until the entire board is covered,use a damp paper towel to remove dirt from any detail that you do not want it on.

Then using Scenic Cement I liberally sprayed the enitre ground work being careful not to let it pool.
Once dryed for a couple of hours I resprayed it again.
Two layers of this with the primer layer will lock everthing down good and tight.
Be sure to flush the spray bottle immedately after spraying using warm soapy water or you will wreck the sprayer.


Now let this dry overnight before priming.